Wednesday, 27 July 2011

Wonderful world of mince continued...

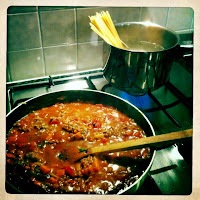
Tonight I already have the main part of my chilli con carne ready to go. Not much pressure now! I can sit down, have a cup of tea, call my mother, call my sister etc, etc. I have saved myself at least an hour when you consider the time it takes to gather ingredients, chop, cook, and wash up.
Since I have a bit of time on my hands I'm going to whip up a little extra something to make dinner a bit more fun than just rice and a one pot wonder.

So I'm making an olive bread, and guacamole to go with.

Olive and Rosemary Bread
1/2 tsp sugar (White, raw, brown, caster, whatever's in the cupboard) I like raw, keeps it natural!
1/2 cup warm water
2 cups flour
1/2 sachet yeast
7-10 pitted green olives chopped coarsley
a small stick of rosemary leaves chopped coarsely (discard the stick!)


Preheat oven to a moderate-hot 220C.
Dissolve sugar into water and add yeast. Cover for 10 minutes or until frothy.
Sift your flour into a large bowl. Add olives and rosemary, and mix well. Pour in the yeast mix and a drizzle of olive oil. Knead in the bowl until smooth. Cover and set aside to rise.

While that's rising I'm going to make some guacamole but here's the rest of the recipe so to avoid confusion:

Roll out onto a flat oven tray lined with baking paper.

Now, before I go any further, I just wanted to say how handy flat trays are. No need roll out onto a floured bench space, then carefully transfer onto a tray, and deal with flour to clean up. You just roll your dough onto a flat tray and bung it in the oven! If you don't have one, it might be worth checking them out. 

I'll do anything to minimise mess. And as you can tell I hate it when flour goes everywhere. Containment is the key!

Anyway, back to the dough.

Drizzle with a bit of olive oil, then bake in the oven for 15 minutes or until golden brown.
Cut into wedges and serve!

Guacamole
1 Avocado
Juice of 1/4 of a lemon
1 tsp sweet chilli sauce

Peel avocado, discard the pip. Then put it all into a bowl, and mash it up with a fork, or use a processor. Your choice. I can't be bothered with the food processor bowl tonight so forks it is!
That's done in less than 5 minutes.


After I've done that my bread will have risen enough start getting it into the oven. (I've used my brother's philosophy here)

Next is the main part.

Chilli Con Carne continued...
This made enough for about 4 people
Basically, my chilli con carne is done. It's been steeping in the fridge taking in all the spices overnight, so the flavour will be at its best. All that's left to do is mix a few more ingredients in and warm it through.

To finish it off you will need the following:

1 tsp tomato paste
200g sweet potato chopped into 1 cm chunks
400g can of kidney beans

Pour stored chilli con carne sauce into a pan and heat on medium.
Add tomato paste and mix until combined with the sauce.
Then add sweet potato and kidney beans including the brine for a richer flavour.
Bring to the boil then simmer until potatoes are tender.


Meanwhile, get rice on the go. 

You know the drill: 1 cup rice : 2 cups boiling water for absorption method.
Bring in a pot bring water to the boil on high and add rice. Boil on high for 5 mins. Stir, then cover on low for 5 mins, turn off the heat and keep covered for 5 mins.


By then your bread should be ready, and your chilli con carne warmed through. 

Serve it up! You're a hero in half the time!

Sunday, 24 July 2011

The wonderful world of mince

Even though we don't all run cafe's there's no reason why we can't organise our kitchens like one. 
In a professional kitchen preparation and efficiency is everything. It keeps costs down. This includes ingredients, labour, electricity etc.
You can relate this to your own home. Unless you're a die hard chef wannabe, or have plenty of time on your hands, why spend loads of time in the kitchen after being at work all day if you don't have to?
So for the next few days I'm going to go through something I did at the cafe to cut my time in half, or by a third for that matter.

Mince is probably one of the most versatile sorts of meat you can cook with.
So I'm going to talk about mince sauce of the tomato based variety. What this is about is saving time in the kitchen, and having something decent to eat at the end of the day.
If you've got the main part of your meal already prepped it takes the decision out of cooking, and saves you running off to the shop to pick up extra ingredients. Plus, it frees up your time so you can even make a little extra something special to go with dinner. Like a sauce, a bread, or even a dessert. 

You won't believe how much time and washing up you'll save, not to mention the emotional stress after a rough day at work!
I also do this beacause it's hard cooking for two without making a big amount of something, and you don't want to be eating the same thing every day. Plus, I'm not a fan of the freezer. A lot of people are so if you like you can make a double amount and freeze this one away. It thaws just fine.

So my mince sauce journey starts today.

It's Monday, the start of the week. It was always going to be a hard slog, so I'm going to make it count by doing the majority of my prep tonight. 
That's just me. I like to get the hard stuff out of the way in one hit. 
If this is too emotionally taxing for you, do it on Sunday, or Tuesday, or whatever day you feel you're emotionally up for it.

Mince Sauce
1/4 cup olive oil
1 bay leaf
500g beef mince
1 large onion finely chopped
4 cloves garlic
3 carrots peeled and chopped
400g can chopped tomatoes
200g tomato paste (a small jar)
1 tsp pepper
2 cubes of beef stock
1/2 tsp salt or to taste

In a deep fry pan or large saucepan heat the olive oil on high. Once hot drop the bay leaf in and fry until fragrant. Add the onion and cook until transparent.
Add beef mince, salt, and pepper and seperate with your spoon so you don't get big uneven chunks.


browned mince


Cook until just brown, don't over cook it. It should look like the photo.
Then add and mix through carrot, can of tomatoes, tomato paste, and garlic. In a glass mix the stock cubes in with 250mL of boiled hot water, stir until dissolved, and add to the sauce. Bring to the boil and then simmer on low for 10 mins.

There, you have mince sauce.


Take it off the heat and store 1/2 in an airtight container. 
I like glass bowls with airtight lids because they dont stain like plastic.
Spaghetti bologniase for two
a small handful of freshly chopped or dried oregano leaves
1/4 cup red wine
1/4 tsp sugar (only add this if you don't like things too tomatoey)
200g pasta

Put the pan with remaining sauce back on the stove, and add oregano leaves, red wine, and sugar. Then get your pasta going for the bologniase.
Bring a medium pot half full of water to the boil, add pasta and cook for 8 mins or until pasta is al dante (just cooked, still a bit chewy)

While that's cooking, you're going to make some steamed vegies for tonight because you can't just load up on meat and carbo's. And there needs to be variety on the table. 
So throw some in a bowl with a bit of water, cover and heat on high for about 3 minutes.

Also, you're going to prep your next dinner.
You've got 8 minutes, you're in the kitchen anyway. Move it!

Chilli con carne prep
In the container full of left over sauce add:

1tsp ground coriander
1tsp ground cummin
1 tsp tumeric
1 tsp sweet, hot or smoked paprika
1/4 tsp dried chilli flakes (double if you like it spicy)

Stir it up, leave to cool, then refrigerate.

By then your vegies will be done, and your pasta cooked.
Strain the pasta and mix in the pan with your sauce to get some flavours through.
Serve with parmesan or tasty cheese (whatever's in the fridge), and your steamed vegies.
 
Dinner date no. 1 finished!

Tuesday, 19 July 2011

Something guilt free after dinner

The other night I had a friend over for dinner who was watching her sugar intake. I had some dates and almonds in the cupboard so I made some biscuits for after dinner. Biscuits are nice and social, and not as much commitment as a cake or bowl of icecream. It means the conversation can continue around the couch with a cuppa in one hand and a biccie in the other. 
Easy, social and sweet!
I love dates and almonds when it comes to something low sugar. They're full of fibre, b-complex vitamins, and iron just to name a few things. You also get a rich texture and flavour without too much compromise, especially when you throw some spices into the mix. 

This is so quick, you can put it together in about 10 minutes if you don't count the 10 minutes it spends in the fridge firming up.


Date and Almond Biscuits
makes 12

1 1/2 cups plain flour*
1tsp baking powder
1/2 tsp ground cinnamon
1/4 tsp ground cardamon
3 level tblsp brown sugar
8 pitted dates rinsed and chopped
8 almonds coarsely chopped
1/4 cup grapeseed oil**
1/2 cup milk


Preheat oven to 160C and line a baking tray with baking paper.
Sift dry ingredients together into a large mixing bowl.
Add grapeseed oil and slowly add the milk. Knead the dough in the bowl until it becomes a nice firm ball.*** Add a splash of milk if it's still too dry.
Shape into a cylinder, wrap with baking paper, and refrigerate for about 10 mins.  Remove from the fridge and cut the dough into 12 biscuits. Bake on the lined tray for about 15 mins or until slightly golden.

Remove from the oven and leave to cool. Serve with a cup of tea or coffee.

There you have it. A low sugar dessert. You'll be enjoying the biccies and talking so much you wont even notice you've missed out on cheesecake and icecream!


* For extra fibre use wholegrain four

** I used grapeseed oil as it is natural and doesn't flavour the biscuits like olive oil. That's what I had in the cupboard but any vegetable oil will do, or you could just use butter.

*** This might sound lazy but it beats the hell out of flouring your bench and getting it all over the floor and your nice clothes. It's the last thing you want when someone's about to knock on your door. Contain the mess by using a bowl which is large enough to get your hands in to knead the dough. You'll save on flour and carbo's. 

**** You can make this dough and store it in the freezer. Just wrap it in baking paper, cover in foil and freeze. When you want to bake the biscuits just let it thaw until the dough feels slightly soft when pressed, cut and bake in a preheated 160C oven.

***** for extra colour throw a small handful of coarsely chopped pistachios into the mix

Friday, 15 July 2011

Adding to the larder

Since I've made some natural yoghurt I thought it would be a good idea to make some Lubneh for some variety. There are two types, the one that is like a dip, and the one that is a much thicker, cheesy texture and rolled into balls.
I'm making the balls today. 

Lubneh balls
Lubneh

500g natural yoghurt
dried oregano leaves or italian mixed herbs
ground chilli to taste
salt to taste
sunflower oil

Put the natural yoghurt in a muslin cloth, or a pillow case.
Twist the case until the yoghurt is squeezed into the bottom of the case and tie it somewhere so the water drains away.
I tie it around the spout and let it hang in the kitchen sink. That way there’s no mess.

If you want the lubneh that is more like a dip, let the water strain for about an hour, if you want to make the labna balls let it hang for a few hours to get rid of more water. This will make it easier to roll into balls.

So once the water has been strained mix the chilli and salt and a little bit of herbs through. Roll them into bite size balls.

Then roll them through herbs and a bit more chilli until they are well covered. Place them in a jar and cover in oil. Store in the fridge.

Traditionally served at breakfast with lebanese bread. Drizzle some of the oil from the jar on top, it tastes great once the flavours have had some time to develop.
It's also beautiful crumbled into a salad. Enjoy!

Wednesday, 13 July 2011

Waste not want not

So I had about a litre of lite milk in my fridge that was going out of date. I know what you're thinking. I thought you said you only drink full fat?
Well I do, which is why this carton was never fully used. But you can't just throw away milk, it's wrong!

Next time you have a bit of milk in the fridge that is about to go off, or is a day or so past its best before date, stop. 

Don't throw it out, I know it's off, but you can turn it into something wonderful!

Making natural yoghurt takes me back to the sweet dairy smell of my Tayta's* house.
She always had a few cows. They were her main source of income after my grandfather remarried. She made cheese, butter, and yoghurt to sell in the markets in Syria.
With the money she made she successfully kept a roof over her head, brought up her remaining two children and gave them an education.


Legend has it that she stitched her money into the curtains in the house so my grandfather would never find it, and sure enough he never did!

It was a sad day when she sold her cows. 

For her it was an indication that she was getting old, and that she couldn't be so independent any more.
For me making this is like taking part in history. According to Wikipedia, 'there is evidence of cultured milk products in cultures as far back as 2000 BCE'.
It's also a respect thing, to food and women who just pick themselves up and get on with it.

Natural Yoghurt 
This is an age old method that has been passed down from mother to daughter for generations.
My great grandmother taught my grandmother, she taught my mum, and mum taught me.
So natural yoghurt gets pretty emotional at Kiki's Table!

1 litre milk
1 cup natural yoghurt (this is your culture)

In a medium sized pot bring milk to a slow boil and turn off heat to cool. 

For natural yoghurt to work the milk needs to be at a particular temperature. 

Don't ask me what this is but here's the history part:

Every good Lebanese girl, or Syrian girl for that matter, has been taught this way. When you can put your pinky finger in the milk for 10 seconds and take it out without feeling like you have to yank it, then it's the right temperature.
I love this, although we have thermometers now this is still the way it's made at home across Arabia.

Once it's reached the right temperature stir some hot milk into the natural yoghurt until it's all mixed in. Then pour and stir this through the rest of the hot milk. Now the milk is ready to be set.
Pour the milk mixture into a container you would like to set it in. I like something airtight.
Then wrap in a towel and store in a dark place for 8 hours or overnight.
Refrigerate when set.

Notes
* Tayta means grandma in Arabic

** For a richer yoghurt always use full cream milk and a rich yoghurt for your culture.

*** For a lighter yoghurt use skinny milk, and a lighter yoghurt for culture. This will set slightly runnier than full fat yoghurt, and have a more sour taste. If it sets too runny, don't panic, just run it through a sieve to get rid of the extra water. That should thicken it up.

Monday, 11 July 2011

Therapy

Apart from the fact that it's Monday, today has been a bit of a drama. Back at my regular waitressing day job it was quiet this morning, clearly the cold left our regulars too stunned to leave the house, or so I think.
Then I had a diner who ordered chicken caesar salad, no anchovies. So I brought it over with the dressing, to which he asked, 'are there any anchovies in this? Because if I have them I will die'. 
Now, I know allergies pretty well, and thought I knew food pretty well too, so I assured him there weren't any in the dressing. On my way back to the kitchen I double checked with the chef to which he replied, 'yes'. 
I nearly died, and so did he! I ran back just in time to save him. I grabbed the plate of dressing and apologised I think about a hundred times.
I felt physically ill afterwards just thinking what might have been.
I'm afraid I wasn't prepared for Chicken Caesar today as a recipe, sorry to disappoint! I don't really make it but I'll keep it up my sleeve for another time.

After a rather emotionally exhausting day, it's time for some therapy. The carbohydrate sort. 
Pasta! Hooray!
I had some left over in the fridge, and since my fridge is brimming with fresh herbs at the moment I'm going for gold.

I love having cooked pasta in the fridge, it's so quick and easy to turn it into a meal for one. Plus, it's a welcome change from toast. I need more today, it was rough!

Chilli Olive Spaghetti with Basil, and Rocket Salad for one

Bowl of cooked pasta
Drizzle of Extra Virgin Olive Oil
Freshly cracked black pepper
Pinch of salt
6 marinated olives chopped
Small handful of grated Parmesan
6 Basil leaves chopped coarsely
Handful of rocket
Dry chilli flakes to taste

In a bowl toss the olives, olive oil, salt and pepper through the pasta and microwave on high for about a minute stirring half way.

No microwave? Just heat on the stove in a pan until warmed through.

Toss through basil leaves and rocket and finish with chilli and and grated parmesan. 

Notes: 

* Use any olives you like, kalamata is good, as are green olives.
I used green olives marinated in rosemary and chilli. 

I marinated a big batch during the Easter break earlier this year. It's the best time to do them, they're in season and there's plenty of time for splitting and soaking, and cleaning the mess up!

Anyway I'll write about those another time.

** To make your pasta look awesome, once you've tossed everything through, get a fork and twirl all the spaghetti around it in the bowl. Then lightly lift it, while removing the fork, so it stands proud and tall. I got this trick from a Donna Hay magazine. It only works if you don't break the pasta, so don't break the pasta!

*** Eating your emotions is good therapy after a hard day...

Sunday, 10 July 2011

Sunday Pizza Part 2

So I went to the State Library to check out an exhibition of news photography.
After that Simon and I went 'round to Town Hall station that has the handiest Woolworths ever, right next to the ticket area, so I didn't have to go far at all!
We picked up some supplies and caught the train home. We were quite hungry after the exhibition, and emotionally drained. Some of the images were very moving and confronting.

Back at home I got back onto pizza. It had doubled in size just beautifully.


You forget how awesome it is when you make it yourself. For some reason I'm not as thirsty at the end of my meal in comparison to when we get the takeaway sort. I think there must be heaps of oil and salt in the latter.
 
Firstly, I kneaded the dough once more, and then divided it into three equal parts.


Before I started the toppings I gave each pizza the following base:
 
Tomato sauce for 3 small pizza's:
3 tablespoons tomato paste
1/4 tsp brown sugar
a few sprigs of freshly chopped oregano
drizzle of olive oil, 
crushed clove garlic

Then I topped each with:
Small handful of sliced onion
Good handful of mozzarella 

Each pizza took about 10-15 mins in a 240C oven.

L-R:  Margherita, Curried Mushroom, Chilli Anchovy & Mushroom
Curried mushrooms with rocket, minted yoghurt, 
and green tomato relish 
Curried Mushrooms (from earlier today)
6 good size mushrooms, whichever you like
1/2 tsp Keen's Curry
Pinch salt
A few sprigs of freshly chopped coriander
Drizzle olive oil

Mix it all up in bowl and let it marinate for an hour or so.

1/3 sliced green capsicum

Put capsicum and mushrooms on your pizza and top with extra mozzarella.
Top the centre with fresh rocket and minted yoghurt, and a dollop of relish on each slice to serve.

Minted Yoghurt
A few sprigs of freshly chopped mint
2 tablespoons natural yoghurt
Pinch salt. (you dont need to do this, it's just the Lebo in me that makes me do it)

This was an absolute cracker! I was so happy with it. The green tomato relish gives it some sweetness, which goes really well with the curry spices, tang of the yoghurt, and the bitterness of the rocket.

Chilli Anchovy & Mushroom
No explanation needed. You like it salty, use heaps of anchovies. You like it chilli, use heaps of chilli. You like mushrooms... you get the idea...

On this little pizza I used a 45g can of anchovies, which I thought was a bit too much. Next time I'll use half as much.

Foreground: Margherita Pizza
Margherita
Small handful fresh basil finely chopped
Mozzarella

Dont be fooled by the simplicity of this pizza. I'm still perfecting it. I've learnt to use fresh basil, and cover the leaves with mozzarella (not tasty cheese) so you don't burn them in the oven. This preserves the sweetness of the leaves during baking and stops them turning bitter.

I had some extra rocket left over so I tossed in with some baked sweet potato, olive oil, and balsamic. Good food can't go to waste!

Saturday, 9 July 2011

Sunday Pizza

So today I'm making pizza. I love to do it on days like today because there is loads of time to prove your dough, and also to gather all your favourite toppings.
My little brother has a pizza shop so I've learnt a few tricks from him, which I will be sharing today.
First thing, you could actually get away with making a decent pizza dough during the week without all the proving time. As far as Az is concerned it goes like this:

1/2 tsp sugar
3/4 cup warm water
satchet of yeast
2 cups plain flour
Pinch of salt
Drizzle of olive oil

Dissolve sugar in warm water, add your satchel of yeast cover and let it rise for 10 mins or until frothy.

In a large bowl mix it in with the plain flour, pinch of salt and a drizzle of olive oil. Kneed until smooth.

Leave aside in a warm place, and go for a smoke. (Not that I will be doing that!)
After one cigarette it's ready to go so pat it out onto a pizza tray, prick the dough with a fork, top with your favourite topping, and place in a preheated 240C oven until golden underneath.

However he does say the longer you leave your dough the fluffier it gets so I'm doing that today. I like it airy...
Plus I want to get a few more things. Like a capsicum, and maybe some rocket.

I'm really craving some mushrooms today so I've marinated some in Keens Curry. I know it's lazy but I can't be bothered to make my own paste. I've chopped up some fresh coriander to with it. That'll do.

I've covered my dough so I'm heading out for a few hours.

Friday, 8 July 2011

Fat

 
No more skinny milk please. Giving me skinny milk is like saying 'may your bones crumble into a million pieces'. Cows were made for milking, not for fat reducing. No thanks, give me the full cow and nothing but the full cow. And thank goodness for the French, at least they appreciate the pleasures of having butter in EVERYTHING! Not that I'm going to go that far...Did I just contradict myself?

Salutations...

Hello,

My name is Sarah Elali. I have a love for food, you say role, I think salad roll!
This blog will centre around food and things that are perhaps discussed around a table. We'll see anyway, depends on how committed I am.

I'm doing this because I need to talk about food, I'm leaving the hospitality industry behind and want somewhere else to unleash my passion.
We'll see if I can keep away... for those of you who are in hospitality know it's difficult to stay away. I'm a graduate architect and traded my scale ruler in for an apron and spoon two years ago, and I have loved it, although my feet haven't! But it's the characters you meet that keep you coming back, and the most wonderful medium of all - food.

Anyway I hope to meet some characters here and write a thing or two on my favourite subject in the world.